After 3 Long Years...
/Finally! After 3 long hellish years of outdated PC specs I've finally had enough cash to update it, it's now safe to say to all Too Much Gaming fans, "Hello boys! I'm back!" -quoted from Independence Day by the guy that was probed by aliens.
Here is the before and after specs of my PC:
| Before | After | |
| Motherboard | Intel Desktop Board D946BZAB | MSI Z87-G45 Gaming |
| Processor | Intel Dual Core E6500 3.0Ghz | Intel Core i5 4670 3.4Ghz |
| Video Card | HIS ATi Radeon HD 4670 512MB GDDR3 | Sapphire ATi HD 6850 1GB GDDR5 |
| Memory | Corsair Value Select 2x1GB DDR2 | Corsair Vengence 2x4GB DDR3 |
| Storage | Seagate Barracuda (320GB & 80GB) | Seagate Barracuda(1TB & 320GB) |
| Audio | SB Creative Audigy Value2 | Realtek ALC1150 |
| CPU Cooler | Deep Cool Alpha 200 plus | Cooler Master TPC 812 |
| Casing | Cooler Master HAF 922 | Cooler Master HAF 922 |
| Power Supply | Ion2 600watts | Ion2 600watts |
Side by side picture of the before and after, notice the enormous amount of dust that was piled up, it’s evidence of how long the previous system and I have been together.
Before
After
Here’s a small description of the new parts that I placed, hope it could help those who want to do an upgrade.
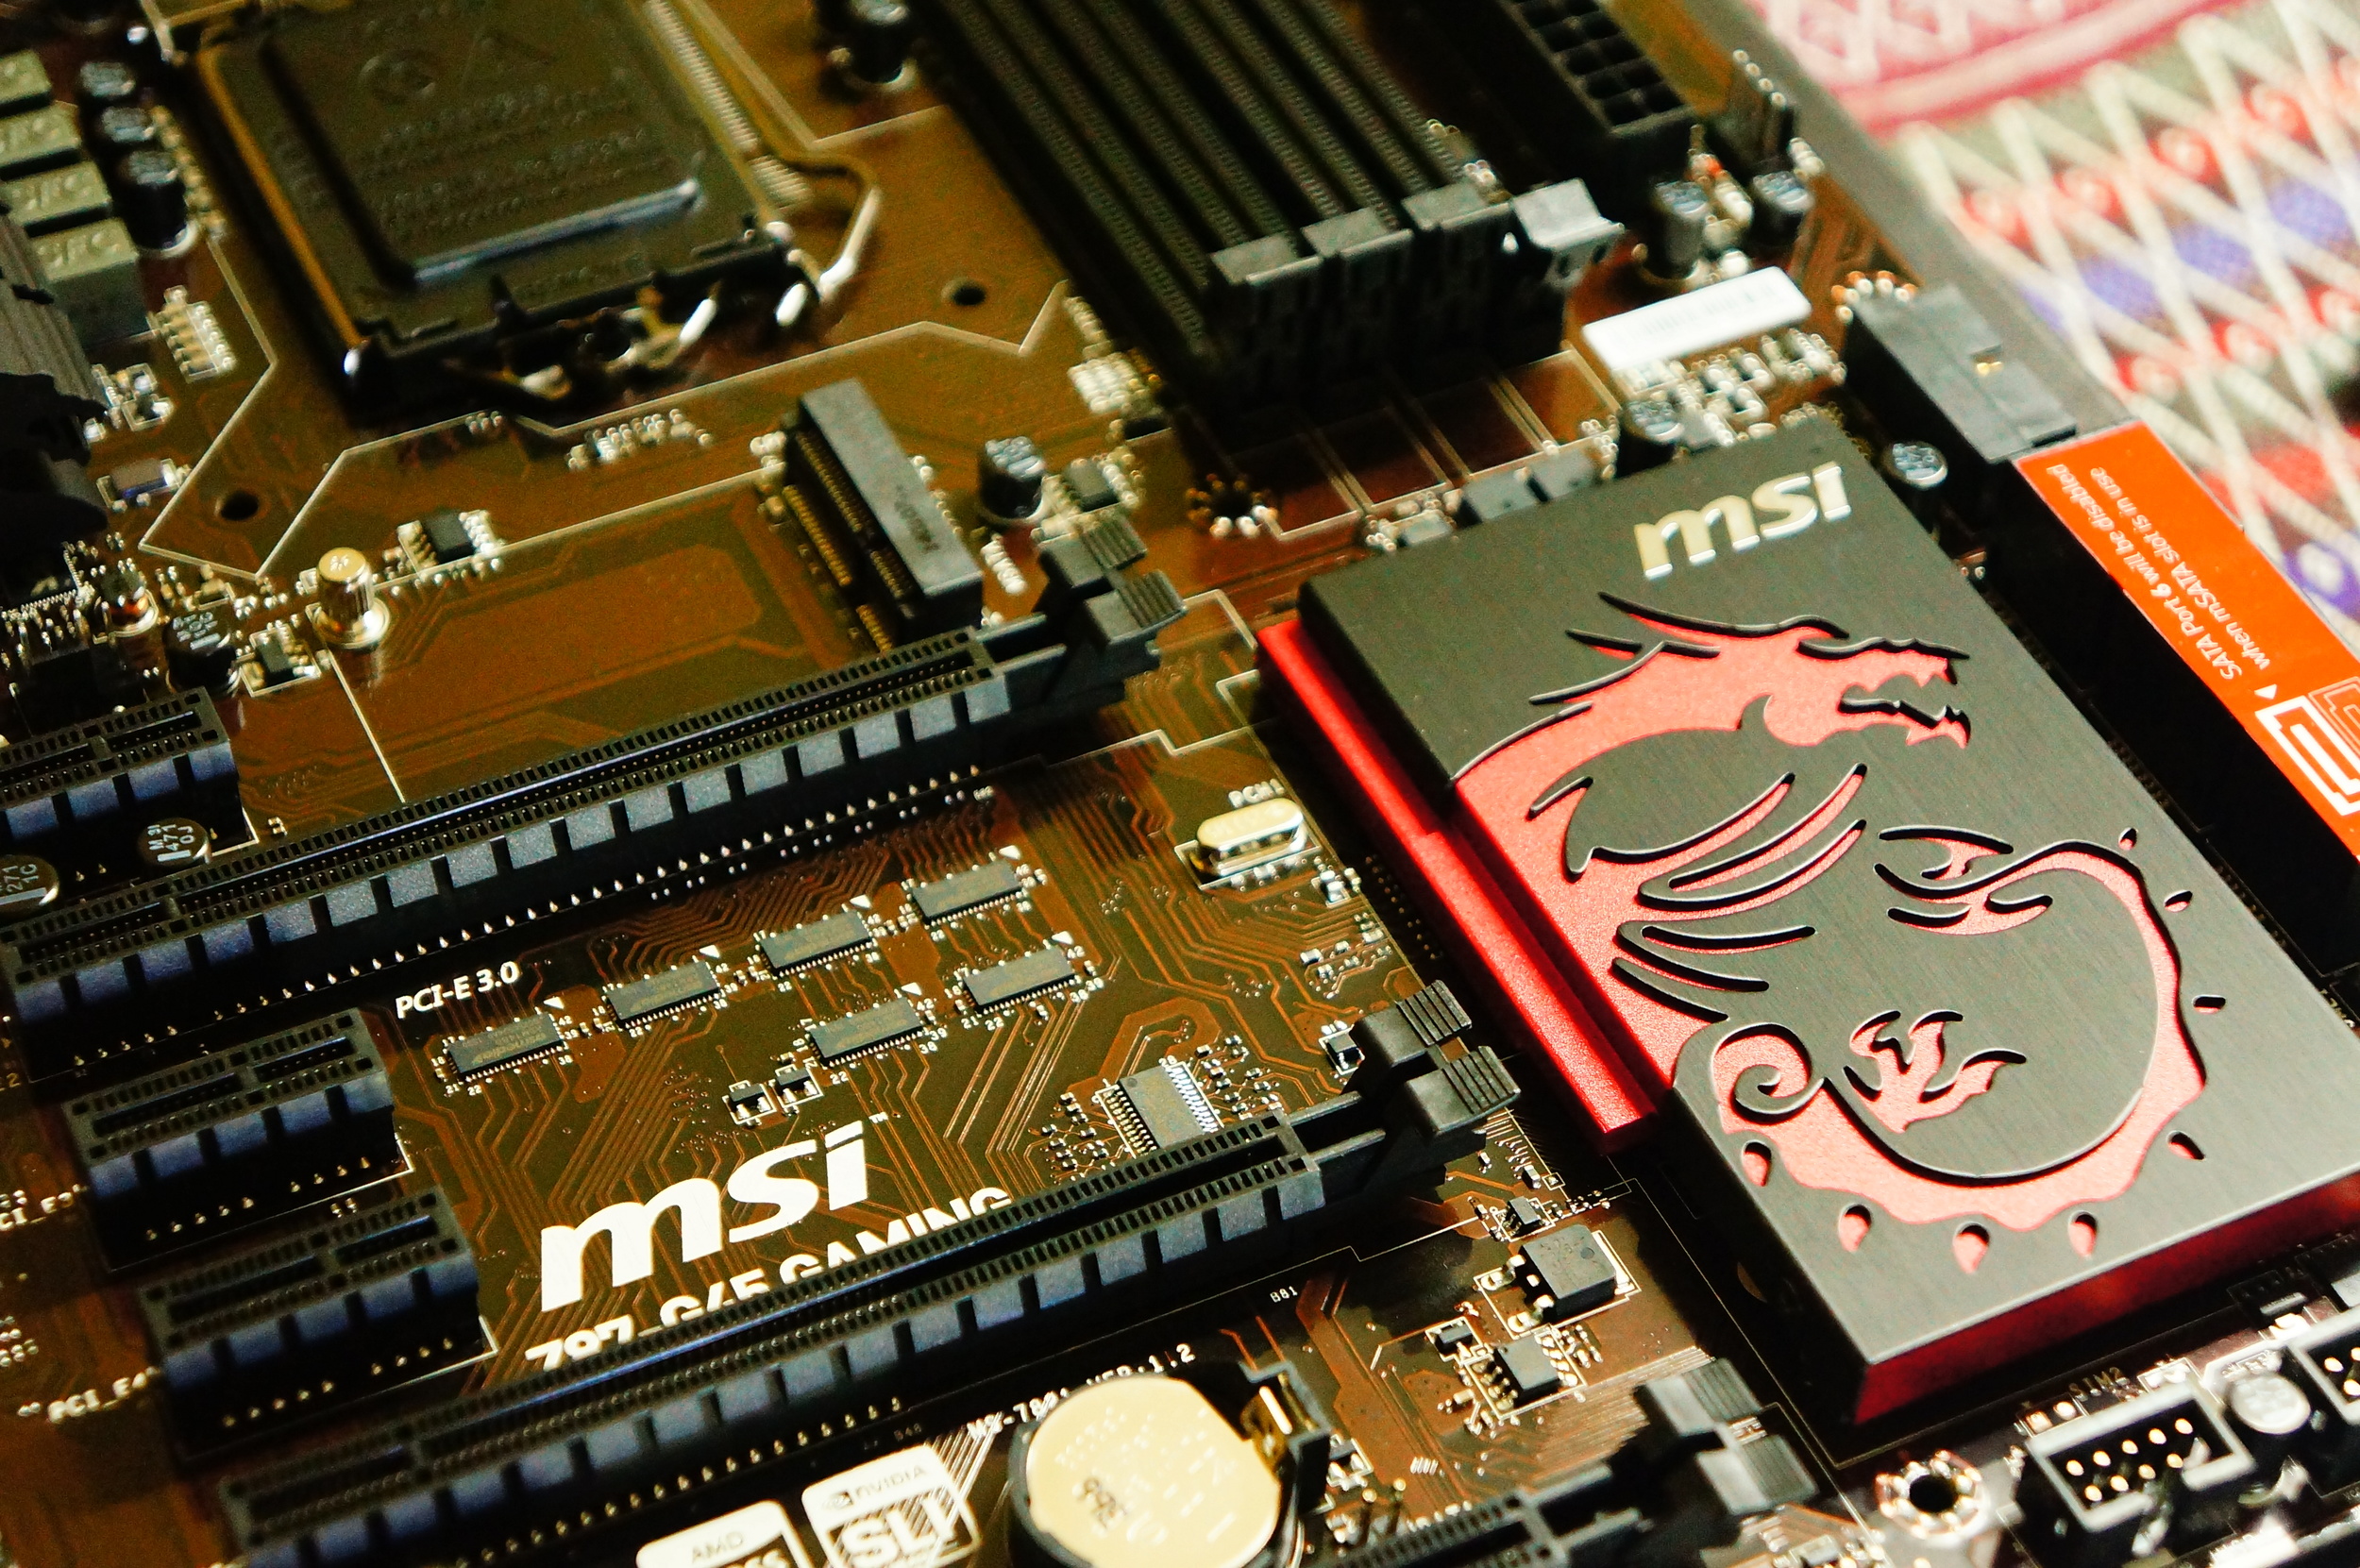
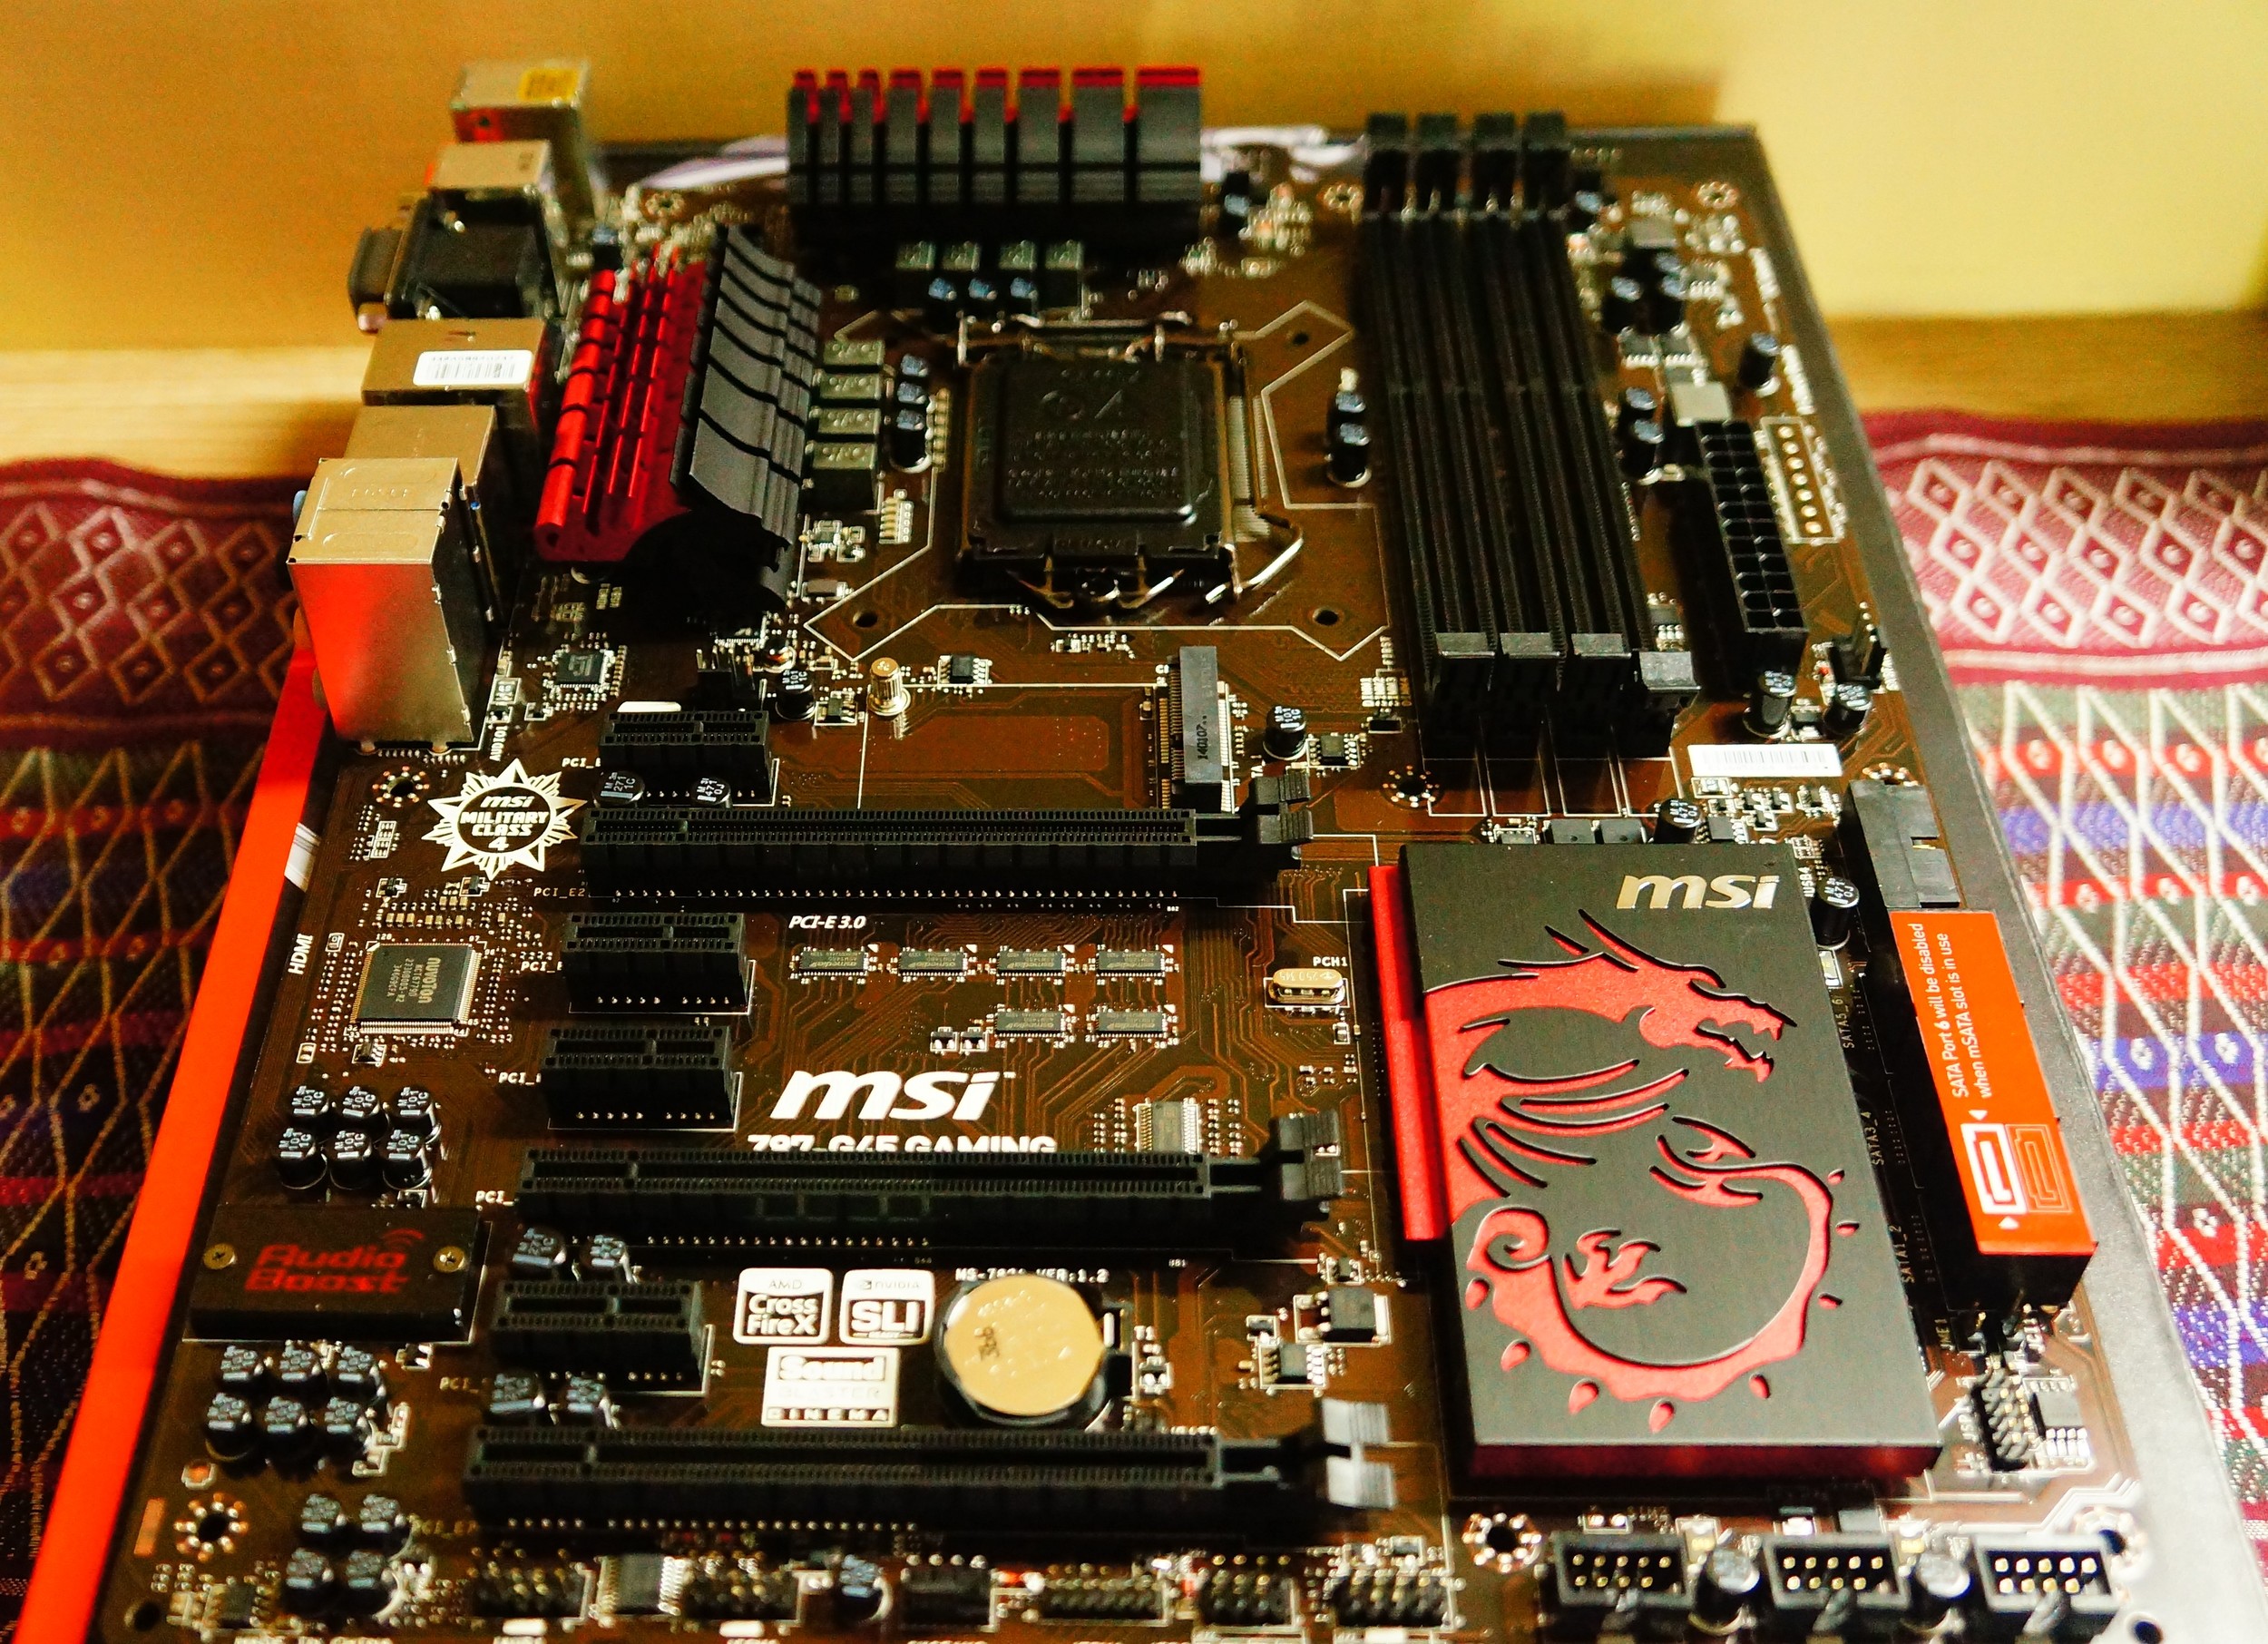
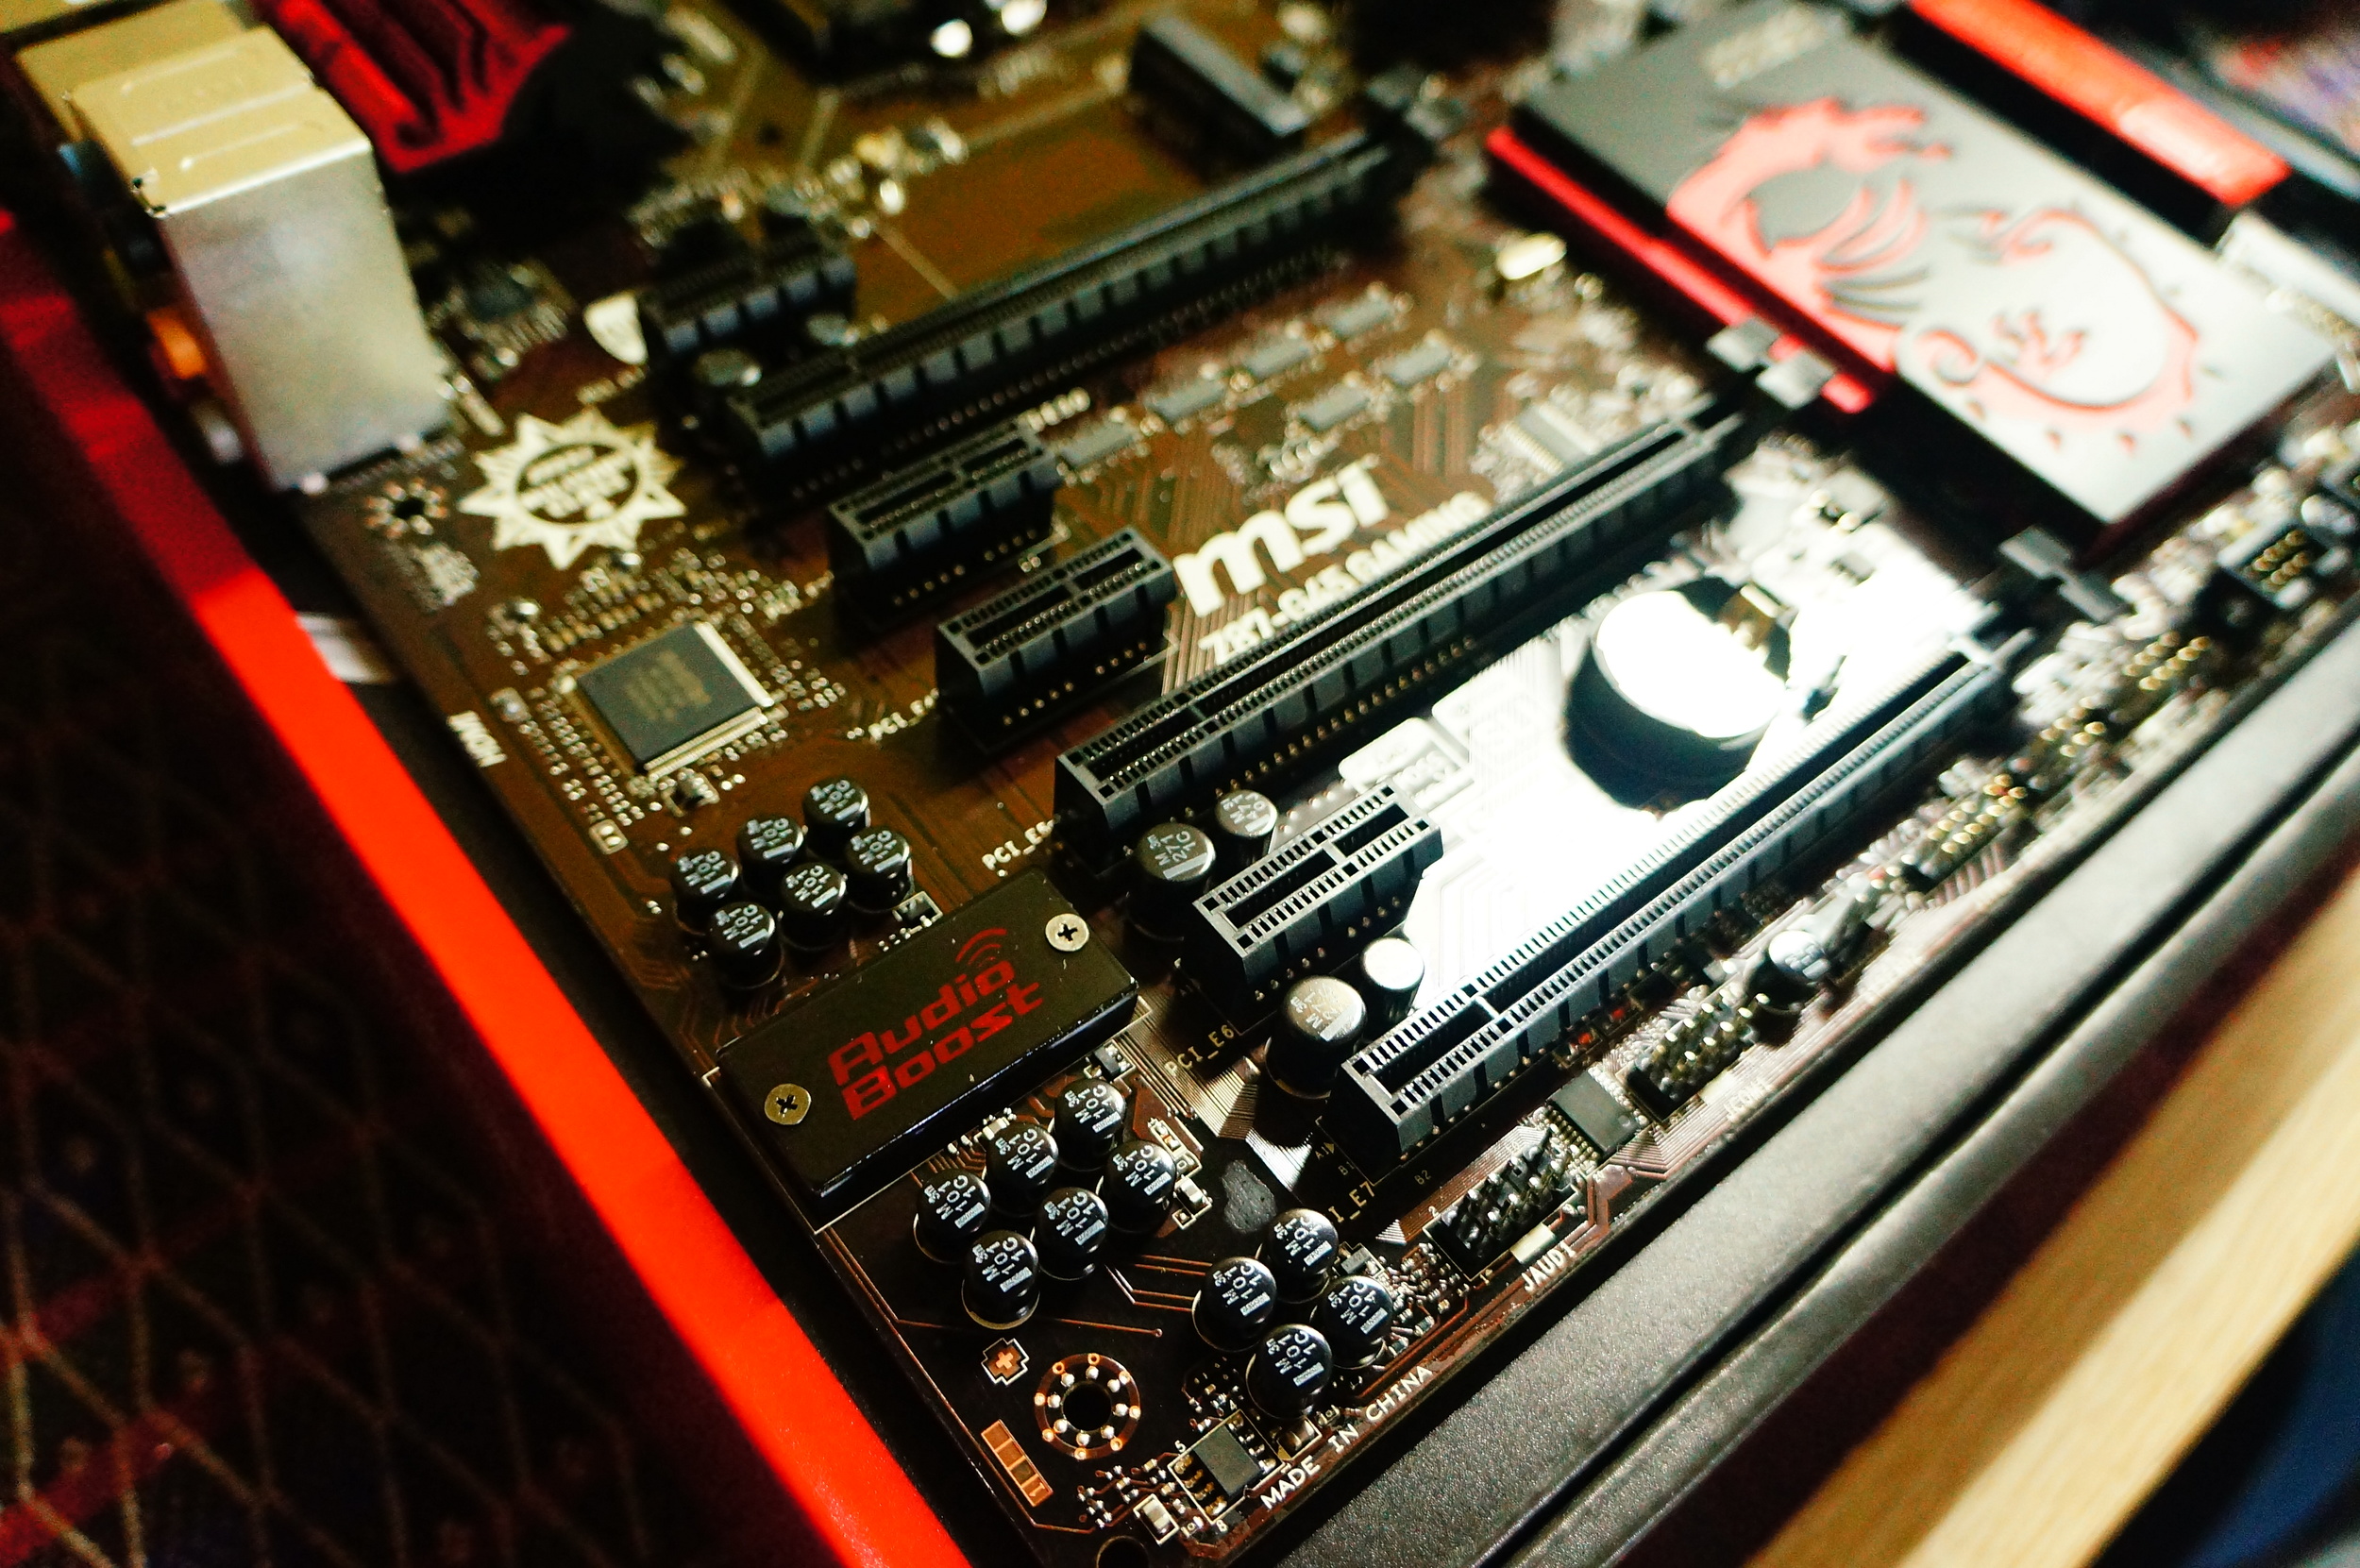
Motherboard: MSI Z87-G45 Gaming *features and specifications are from the MSI website.
Features
- Intel® Z87 Express Chipset
- Supports 4th Gen Intel® Core™ / Pentium® / Celeron® processors for LGA 1150 socket
- Supports DDR3-3000(OC) Memory
- USB 3.0 + SATA 6Gb/s
- Audio Boost: Reward Your Ears with True Quality
- Killer Ethernet: Kill Your Lag
- Military Class 4: Top Quality & Stability
- OC Genie 4: Overclock in 1 Second
- Click BIOS 4: Easily Fine-tune Your System
- PCI Express Gen 3: World's 1st PCI Express Gen 3 Motherboard Brand
- Multi-GPU: NVIDIA SLI & AMD CrossFire Support
- Sound Blaster Cinema: Realistic Surround Sound Experience
- Gaming Device Port: Optimized with Triple Gold-plating for High Polling Rate Gaming Devices
- Total Fan Control: Optimize All Fan Speed As You Wish
Specifications
- Socket: 4th Generation Intel LGA 1150
- Chipset: Intel® Z87 Express Chipset
- DDR3 Memory: 1066/1333/1600/ up to 3000*(*OC) MHz
- DIMM Slots: 4
- Max Memory (GB): 32
- PCIe 3.0 x16 slots: 3
- PCI-E Gen: Gen3 (16,0,0), (8,8,0), (8,4,4)
- PCIe 2.0 x1 slots: 4
- SATAIII slots: 6
- LAN: 10/100/1000*1
- USB 3.0 ports: 2(Front) & 4(Rear)
- USB 2.0 ports: 6(Front) & 2(Rear)
- Audio: Realtek® ALC1150 Codec
- Video: On-board VGA / DVI / HDMA
- Form Factor: 12 in. x 9.6 in. (30.5 cm x 24.4 cm) ATX Form Factor
- SLI / Crossfire: Supports 3-Way AMD CrossFire Technology or Supports 2-Way NVIDIA SLI Technology
“Let the games begin: MSI GAMING motherboards are designed to provide gamers with best-in-class features and technology. Backed by the imposing looks of MSI's Dragon, each motherboard is an engineering masterpiece tailored to gaming perfection.”- quoted from MSI’s website.
First 4 words alone were enough to capture my interest; but, this board wasn’t my first choice. Initially, I considered Gigabyte but due to my lazy ass I opted for a more easily obtainable board on the Philippine market which is MSI and based on the reviews that I’ve read, as well as, my initial impressions, the board is great.
MSI Z87-G45 is neatly organized and properly labelled; it even has instructions on what DIMM slots to use when using two memory sticks. The MSI dragon adds a fierce and serious look to the board; but, it would’ve been nice if the dragon has red LEDs. Another slight disappointment is that the board isn’t black, it’s brownish not that anyone would notice when it’s put in place still would be good if it’s black.
The BIOS is a thing of beauty, the whole interface can be operated via mouse and there’s a nifty feature there called “Explore Board” where you’ll be taken into a visual representation of the board where you can identify which and what part is connected. You can also find the overclock genie in the BIOS for a one click overclock setup, which let me note early on that I’m not a fan of overclocking. Other features also include the Military Class 4 label, means that the board can endure high levels of stress and temperature, and that the components used are of good quality. You can check out the link for the tests made: http://www.maximumpc.com/article/news/msi_certifies_military_class_components_claims. Another is the “Killer Ethernet” which can be set to prioritize the games to use the LAN connection, will try that out in the future. Last but certainly not the least is the gold plated USB ports which ensure good communications between your gaming devices and the board.
Audio: Realtek ALC1150 (On-board) *features and specifications are from the MSI website.
Features
- Studio level Integrated 600Ω Headphone amplifier
- Golden audio jacks for pure audio signals
- EMI shielded audio codec
- High quality audio capacitors
Good bye to my very old SB Creative Audigy, the card has served me for a long time give or take 10 years; it’s still operational but the hardware is severely out-dated that you can no longer buy this type of card anywhere. Using an on-board audio is a first for me so during my initial sound testing of rock n’ roll music, I was pleased that it came out great. I expect that games with roaring sounds will come of crystal clear.
Based on the website of MSI, the RealTek ALC1150 runs on a different circuitry which would mean that you should encounter less interference, like the website says. Just like the USB and PS/2 ports, the audio ports are gold plated for better conductibility of the jacks –I may need to buy another speakers to fully appreciate the sound. However, even when the audio jack is not gold plated you can still hear the clear and full sound of any game or music.
The only problem I had is installing the drivers, the ones in the installation CD is obsolete that whenever I install the driver, the driver crashes and no more audio. I was able to fix the problem by completely removing the driver and then installing the latest one from MSI website, after doing that it was all smooth sailing.
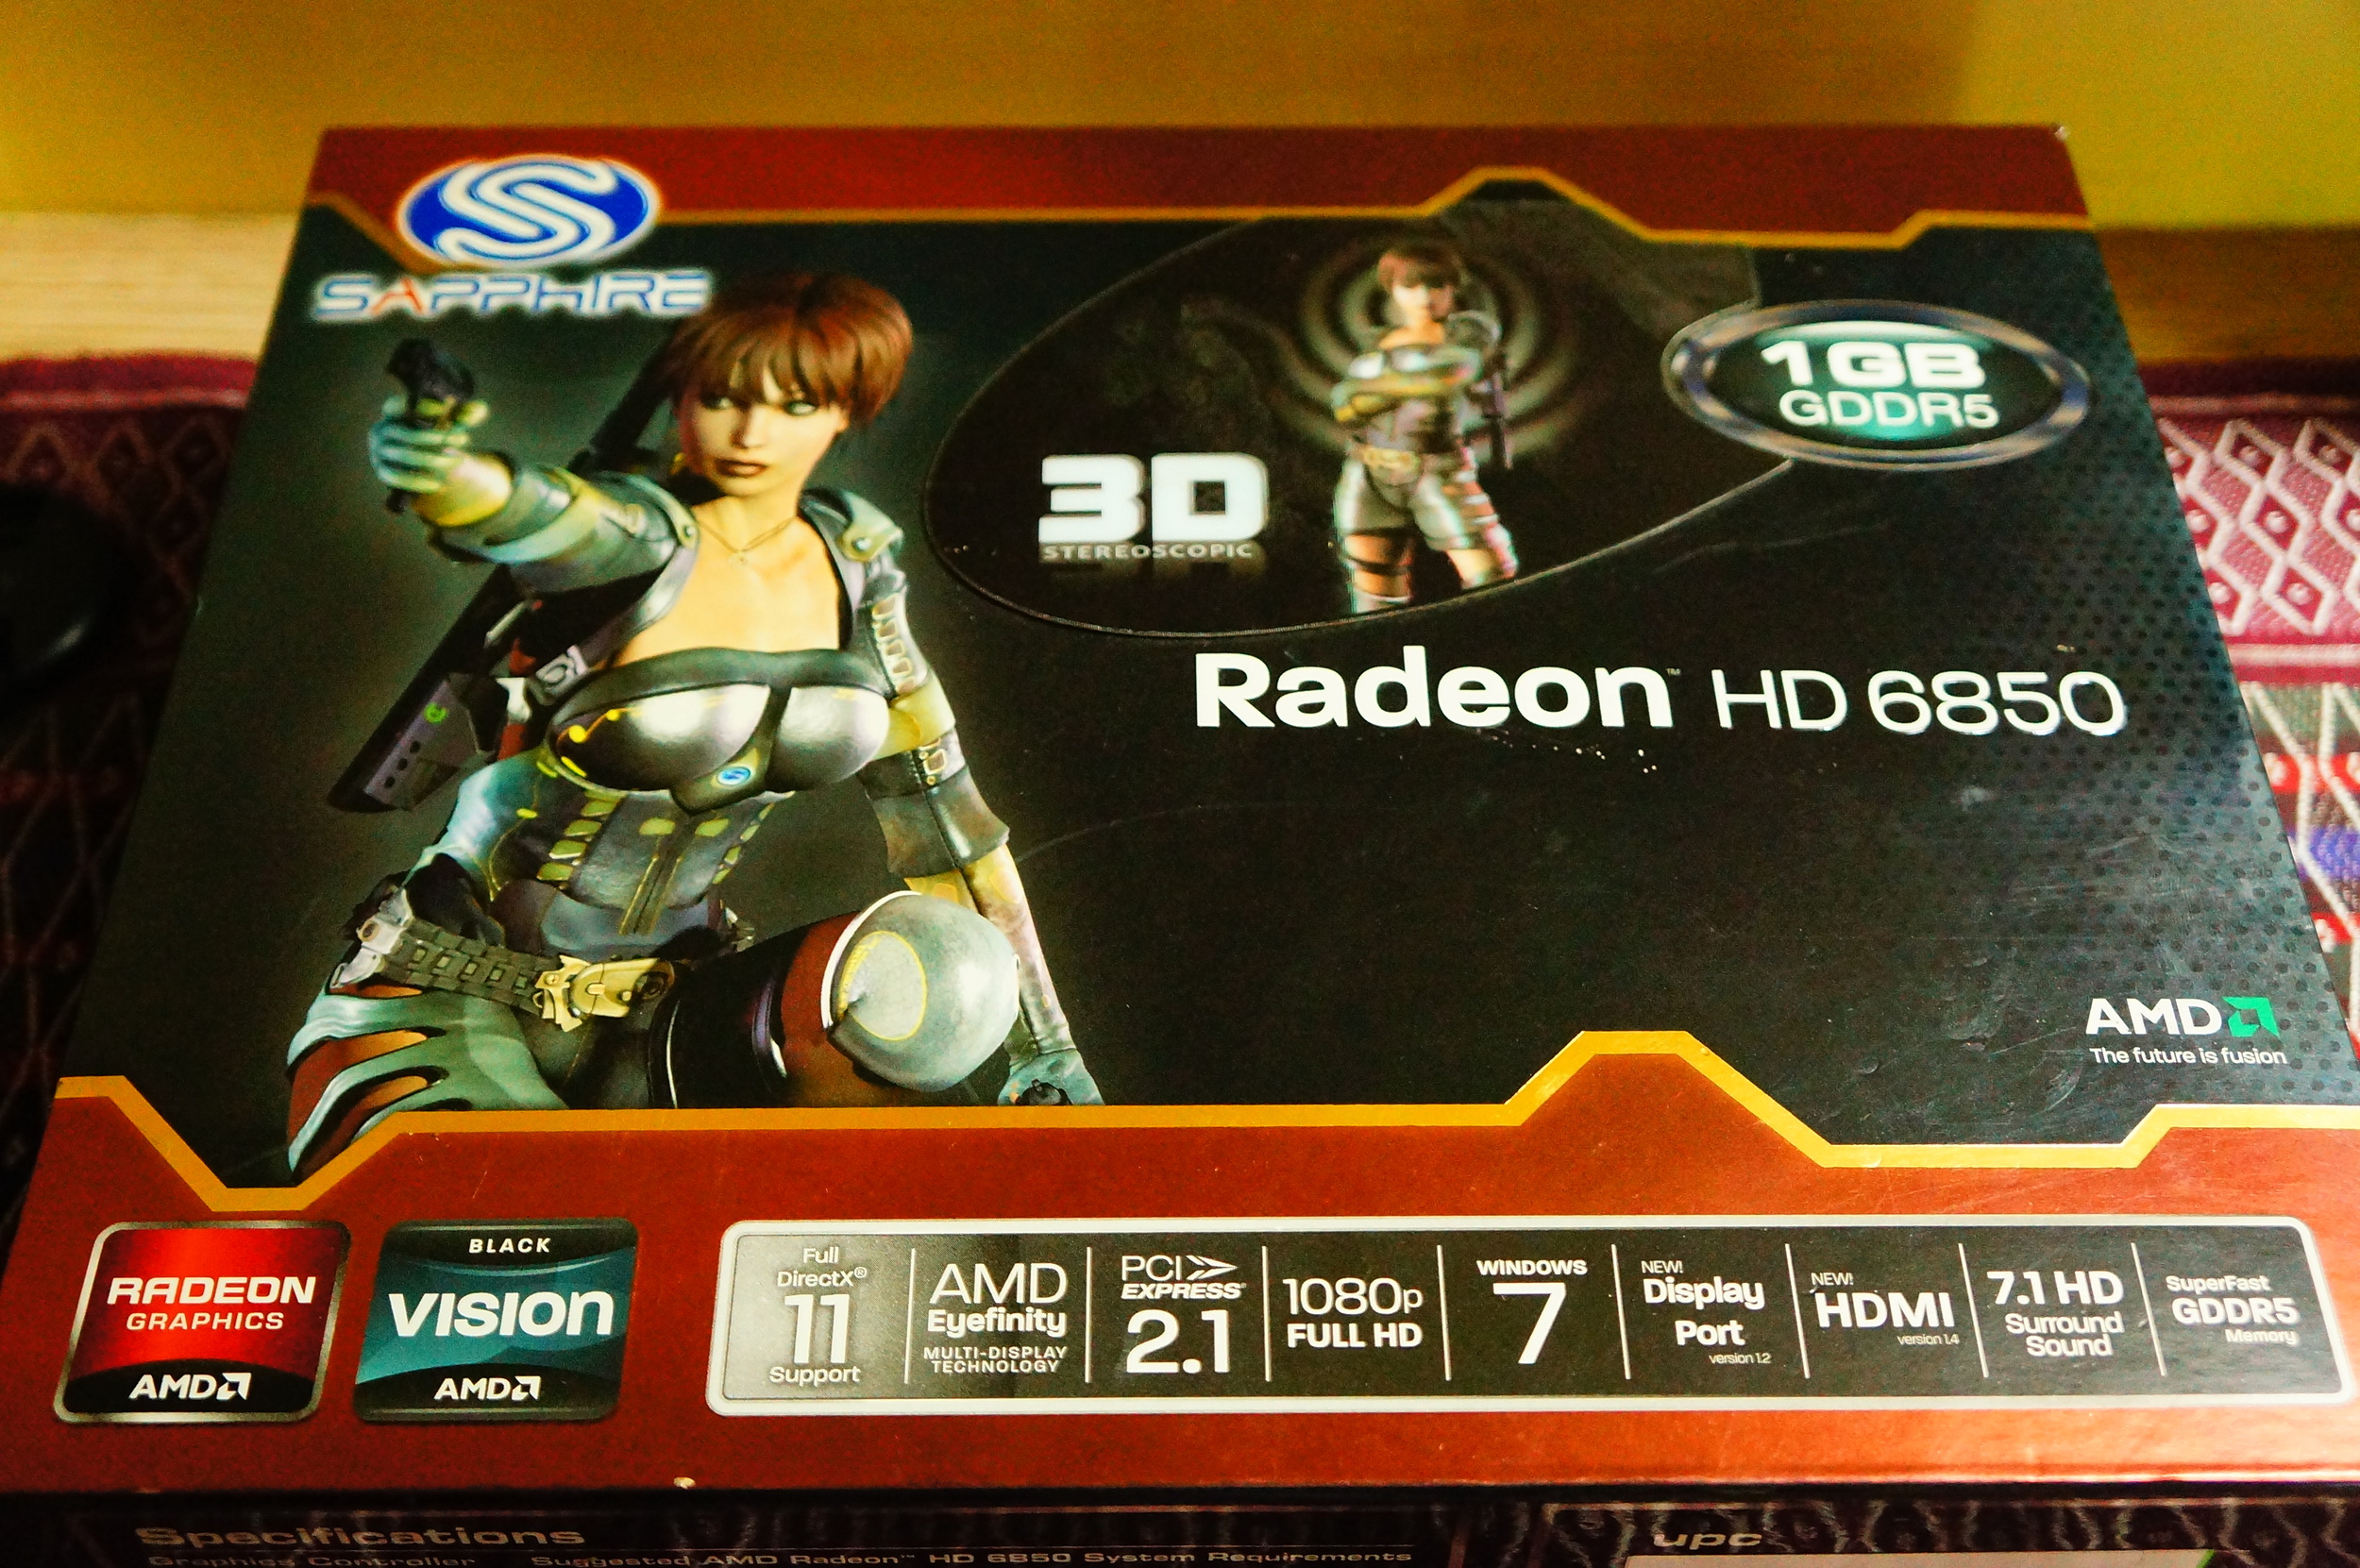
Video: Sapphire ATi HD 6850 1GB DDR5 *features and specifications are from the Sapphire website.
Features
- HDMI (with 3D) Support for Deep Color, 7.1 High Bitrate Audio, and 3D Stereoscopic
- AMD Eyefinity Technology
- AMD CrossFireX Multi-GPU Technology
- AMD HD3D Technology
- Accelerated Video Transcoding
- Dolby TrueHD and DTSHD Master Audio Support
- Physics processing support
- AMD Advanced Parallel Processing technology
- TriXX UtilityAMD
- PowerPlay
Specifications
- Display Support: 4 x Maximum Display Monitor(s) support
- Output: 1 x HDMI (with 3D) & 1 x DisplayPort & 1 x Dual-Link DVI-I, 1 x Single-Link DVI-D
- GPU: 775 MHz Core Clock
- Video Memory: 1024 MB Size GDDR5
First of I’d like to give a shout out to Daniel Marco Cabral for without him I wouldn’t have this video card. He gave it to me as a present before resigning, that’s right you heard it correct, “as a present” –translation: FREE!
Just like my audio card, the current video card in my build is way above the specifications of its predecessor. I tried playing Skyrim on my old video card, it such an atrocity to the game that I immediately stopped and removed. Now, I can run Skyrim on a high level setting, I can still push it to ultra high if I want. Safe to say, PC Gaming I’m back!
Processor: Intel Core i5 4670 3.4 GHz *specifications are from the Intel website.
Specifications:
- Sockets Supported: LGA1150
- Number of Cores: 4
- Number of Threads: 4
- Clock Speed: 3.4 GHz
- Max Turbo Frequency: 3.8 GHz
- Cache: 6 MB Intel® Smart Cache
- Max Memory Size: 32 GB
- Memory Types: DDR3-1333/1600
- Number of Memory Channels: 2
- Intel 64bit: Yes
I had two options for the processor, first one was 4670k and the second one 4670. Both exactly the same in terms of specifications, the only difference is the locking of the processor. I was about to buy the 4670k but then I figured since I won’t overclock my machine might as well go for the locked version cause it’s cheaper.
Installation of the processor is a breeze; it’s just like any CPU installation. Place the processor over the motherboard pins, take note of the orientation then carefully drop the processor over the pins, after lock the processor in place and you’re done. I didn’t use the stock CPU cooler, I know it’s over kill but my experience with stuff over heating is notable. The experience has taught me to go for a good cooler rather than breaking it early, and considering that the Core i5 cost me money, I’d like to keep it safe for a long time.
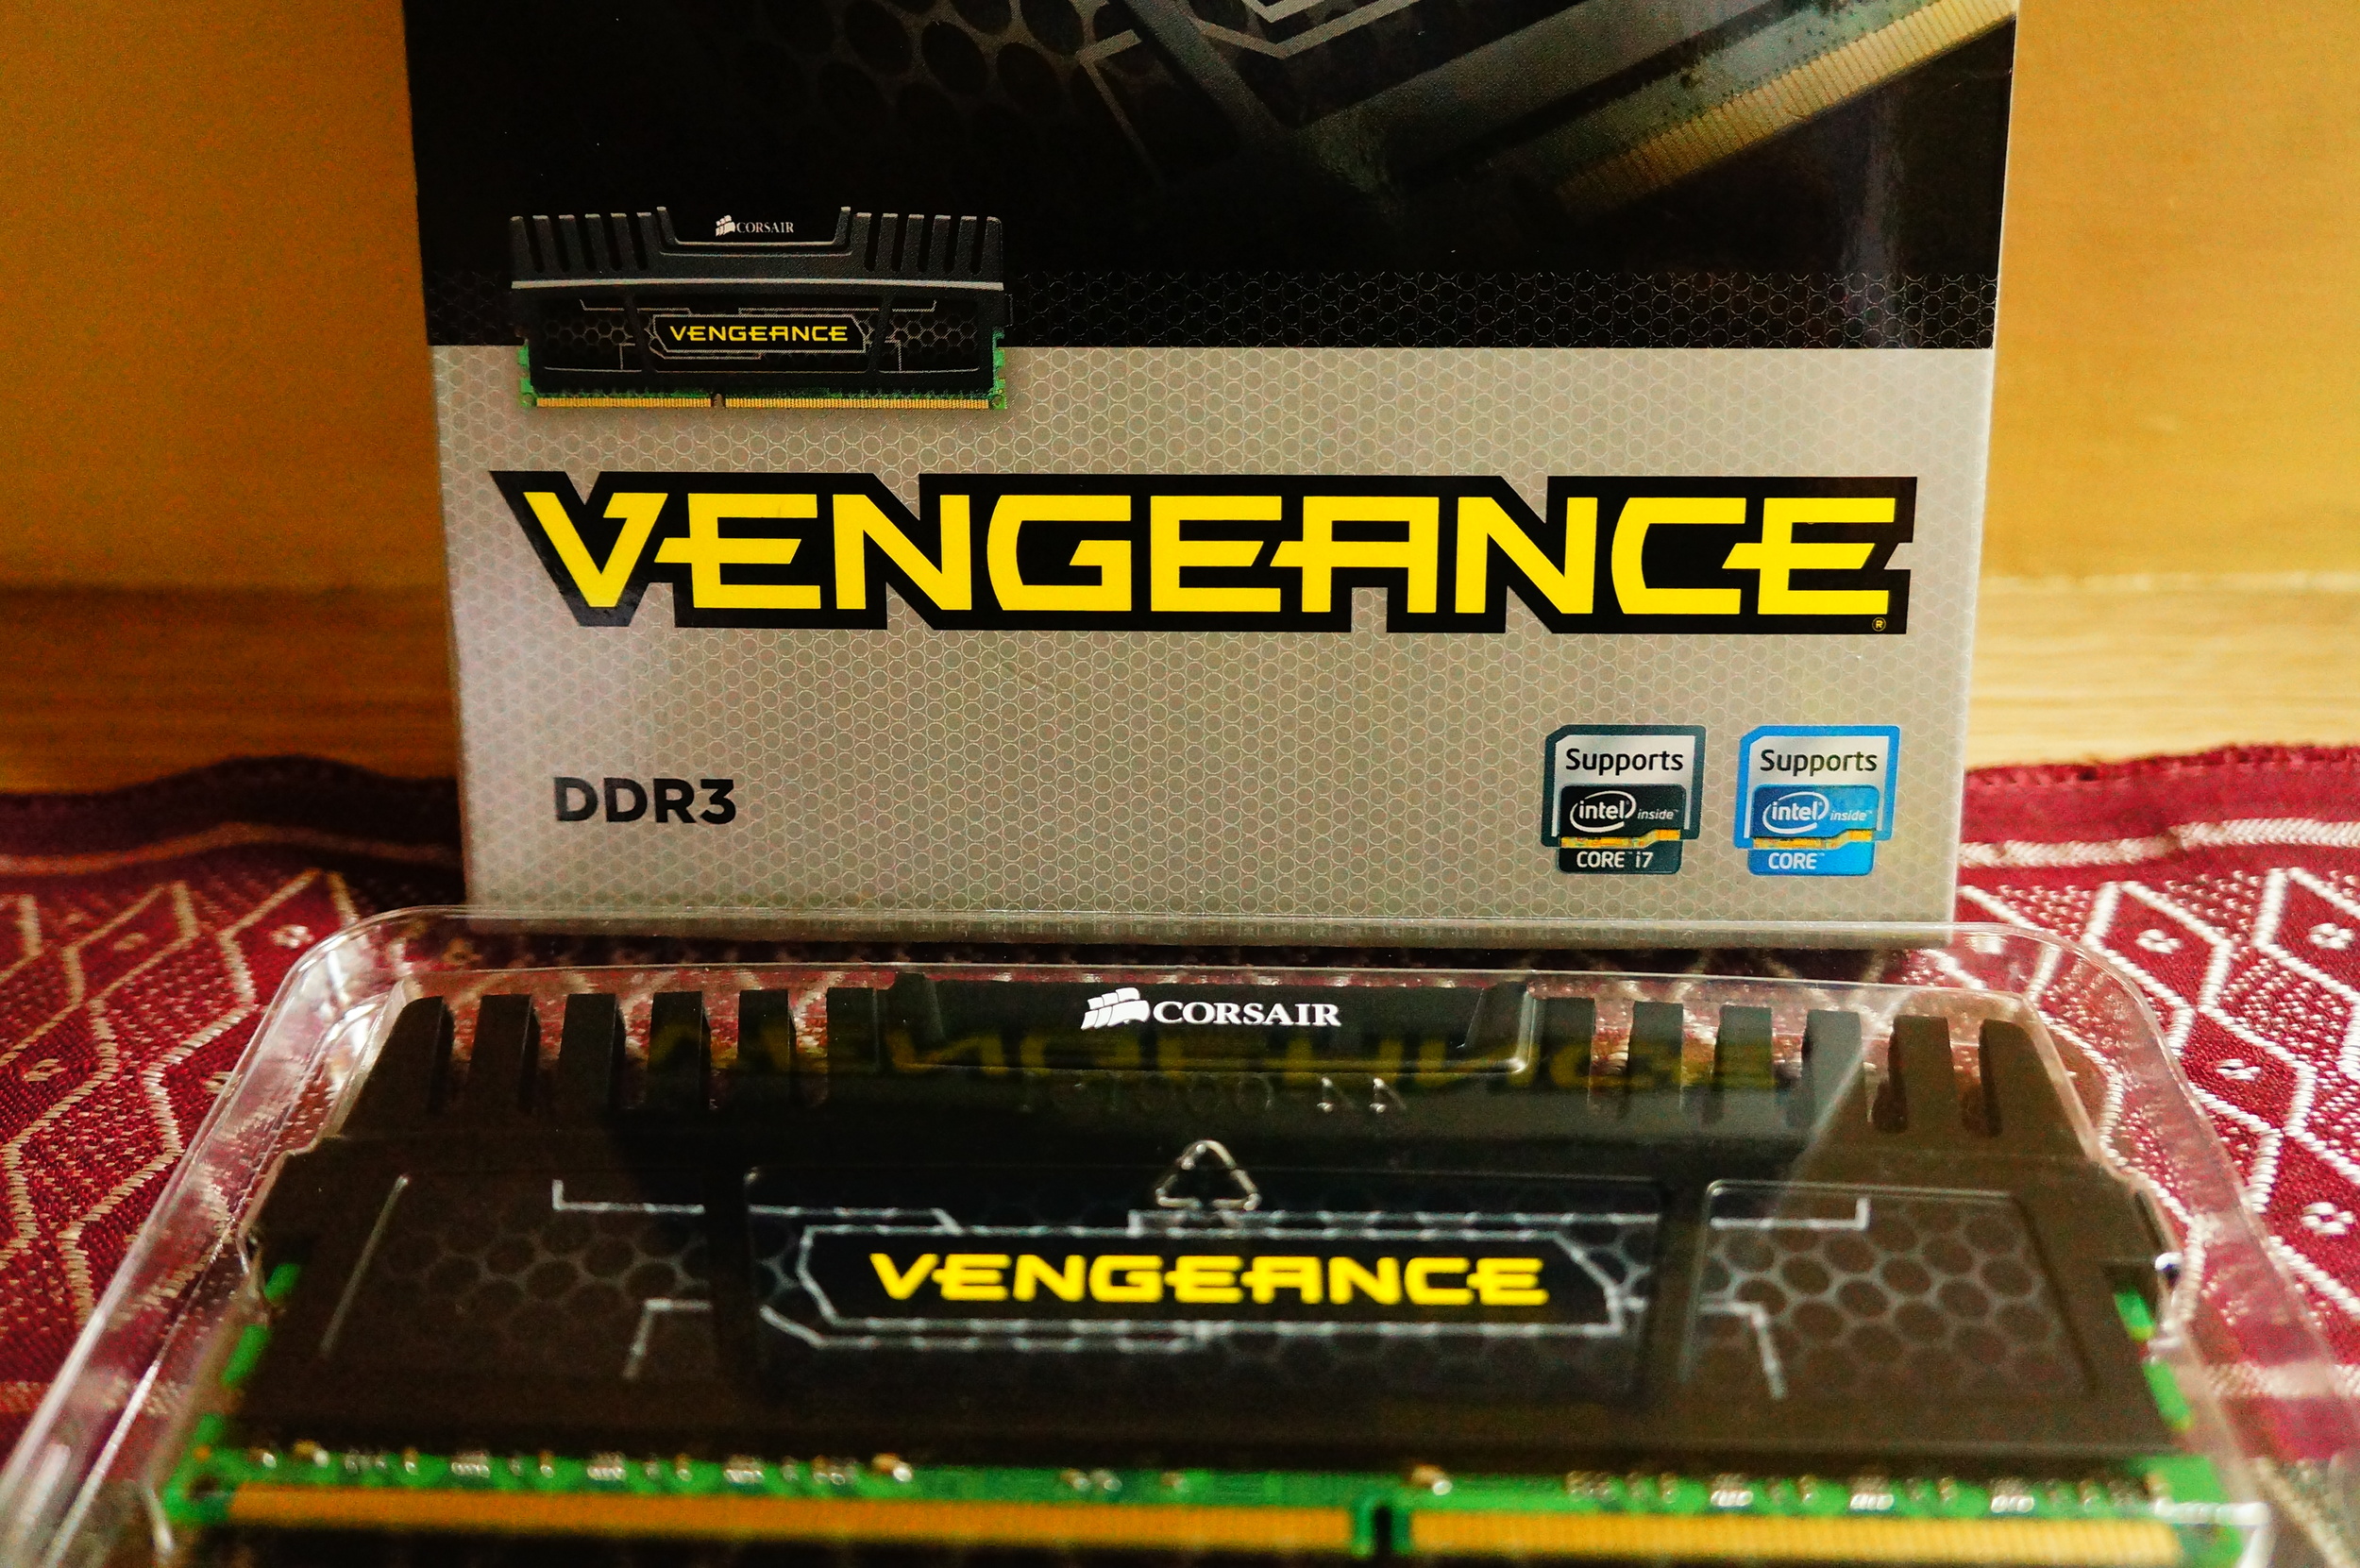
Memory: Corsair Vengeance 2x4GB DDR3 *features and specifications are from the Corsair website.
Features
- Maximize your system memory capacity for ultimate performance
- Specially selected RAMs for overclocked performance
- Includes XMP performance profile
Specifications
- Heat Spreader: Vengeance
- Memory Configuration: Dual Channel
- Package Memory Format: DIMM
- Memory Size: 8GB Kit (2 x 4GB)
- SPD Latency: 9-9-9-24
- SPD Speed: 1333MHz
- Tested Latency: 9-9-9-24
- Tested Speed: 1600Mhz
Corsair Vengeance is one mean looking memory stick. The fins give it a mean look, and unlike the Corsair Dominator where the fins are all slim and straight wards, the Vengeance have wide fins curved at an angle giving it a more sophisticated look. The fins are about an inch long, which is common for high profile memory modules, are a nuisance when I installed my cooler because I had to adjust the fan, I’ll get into the details for that fiasco in a bit.
Performance wise, all memories are somewhat the same; there are very little performance difference between using a regular memory and a high profile one. Only difference is how it’s cooled, a regular is dependent on air cooling and a high profile one has a heat spreaders in order to withstand higher temperatures when overclocking. I choose Corsair because since I got into PC gaming, Corsair has always been my go to memory and I’m not about to change that.
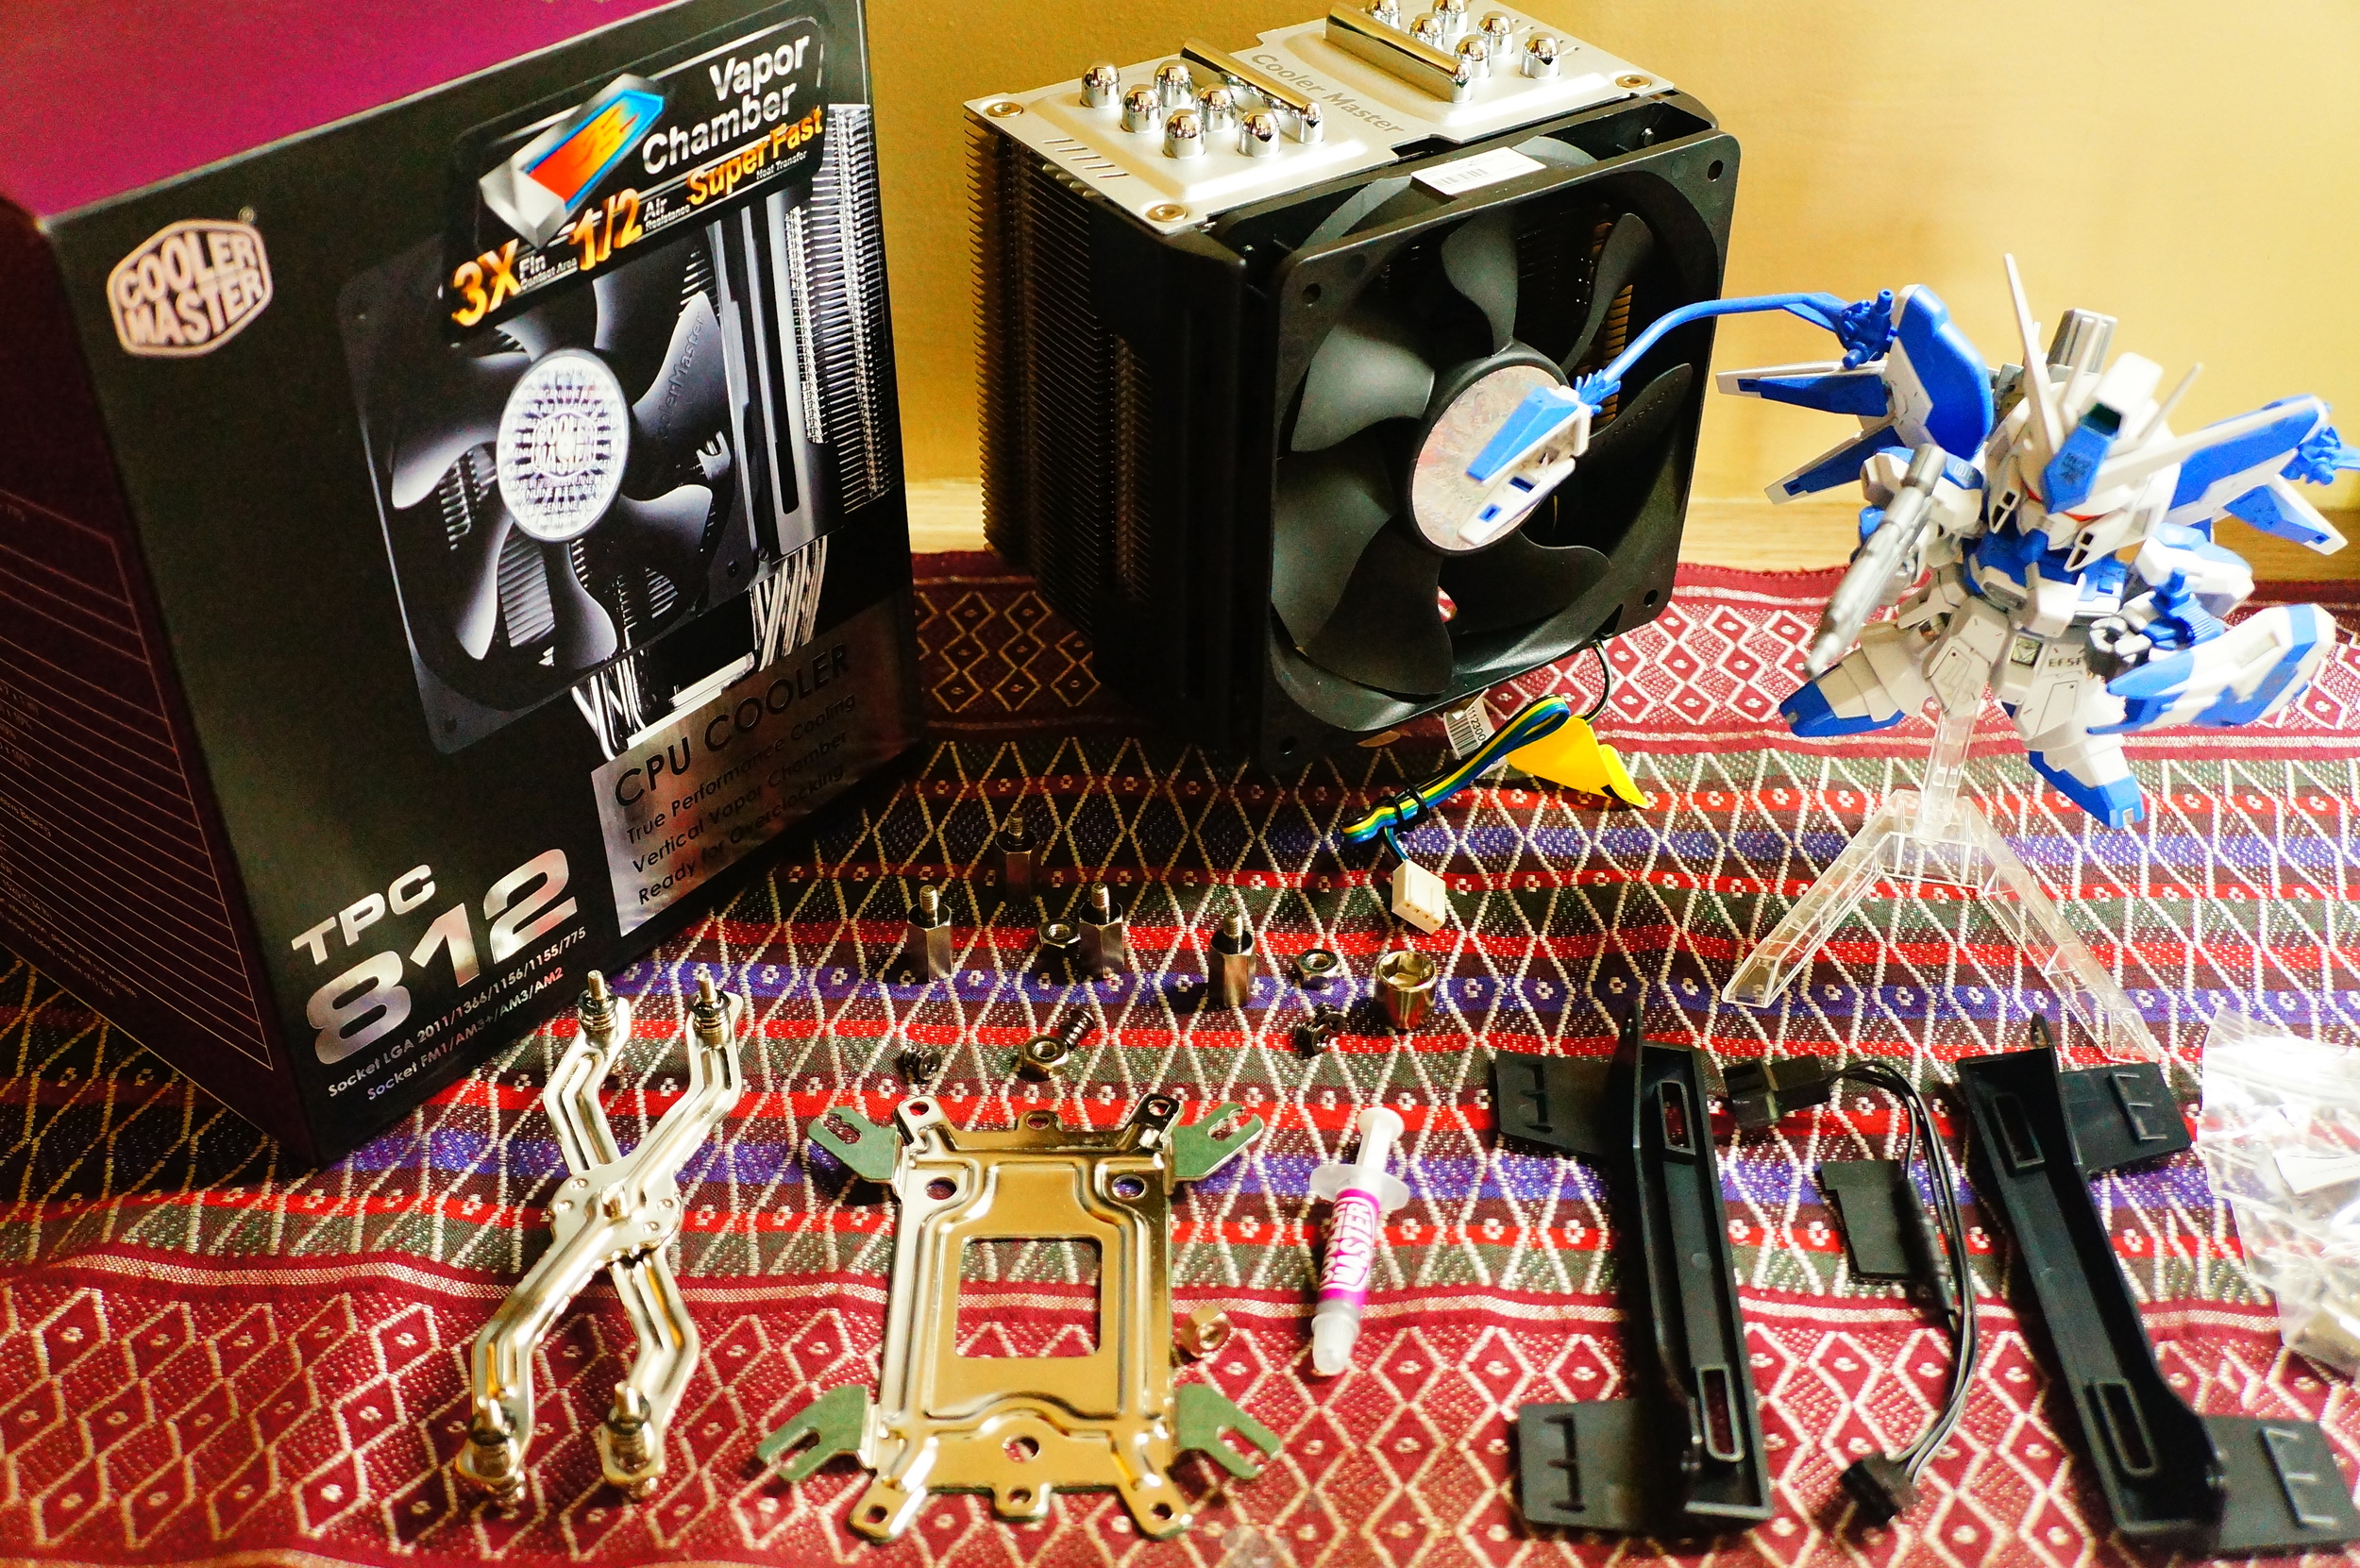
CPU Cooler: Cooler Master TPC 812 *features and specifications are from the Corsair website.
Features
- Uses 2 separate cooling technologies to transfer heat – heat pipes and Vertical Vapor Chambers.
- The first-ever CPU heatsink to use Vertical Vapor Chamber technology.
- 100% pure polished copper base – combined with improved soldering technologies for the best thermal transfer.
- Special fin design – heatsink receives concentrated cold airflow.
- Improved air pressure design and fan mounting system.
Specifications
- Intel Socket: LGA 2011 / 1366 / 1156 / 1155 / 1150 / 775
- AMD Socket: FM2 / FM1 / AM3+ / AM3 / AM2+ / AM2
- Dimension: 138 x 103 x 163mm (5.4 x 4.1 x 6.4 in)
- Heat Sink Dimensions: 134 x 74 x 158 mm (5.3 x 2.9 x 6.2 in)
- Heat Sink Material: Copper Base / 2 Vapor Chambers & 6 Heatpipes / Aluminum Fins
- Heat Sink Weight: 826g (1.83 lb)
- Fan Dimension: 120 x 120 x 25mm (4.7 x 4.7 x 1 in)
- Fan Speed: 600 – 2,400 RPM (PWM) ± 10%
The first thing that I thought when I saw this cooler is it’s huge, I mean seriously huge, it’s like an engine radiator is popping out of my case. Setting it up is also a little bit tricky since it’s compatible with all known processor socket, meaning a lot of parts, there was a time when I was so stumped that I just stopped and procrastinated. Eventually I was able to fit it in and it looks absolutely awesome. The polished finish, the fin design, and the mere height of it –awesome, combine it with the HAF922 it was an absolute marvel.
I bought this cooler out of a whim, due to the very hot summer here in the Philippines I opted for a third party cooler instead of the stock one; I asked what was available and he gave me a cooler master TPC 812. First I was hesitant because I don’t know anything about the cooler but then again what the heck I’ll be able to use this when I make another upgrade so I went with it. Upon installing the back panel I figured that it’s the same as with all CPU coolers, you just need to adjust the lock and screw mechanism to fit the socket then it’s all good.
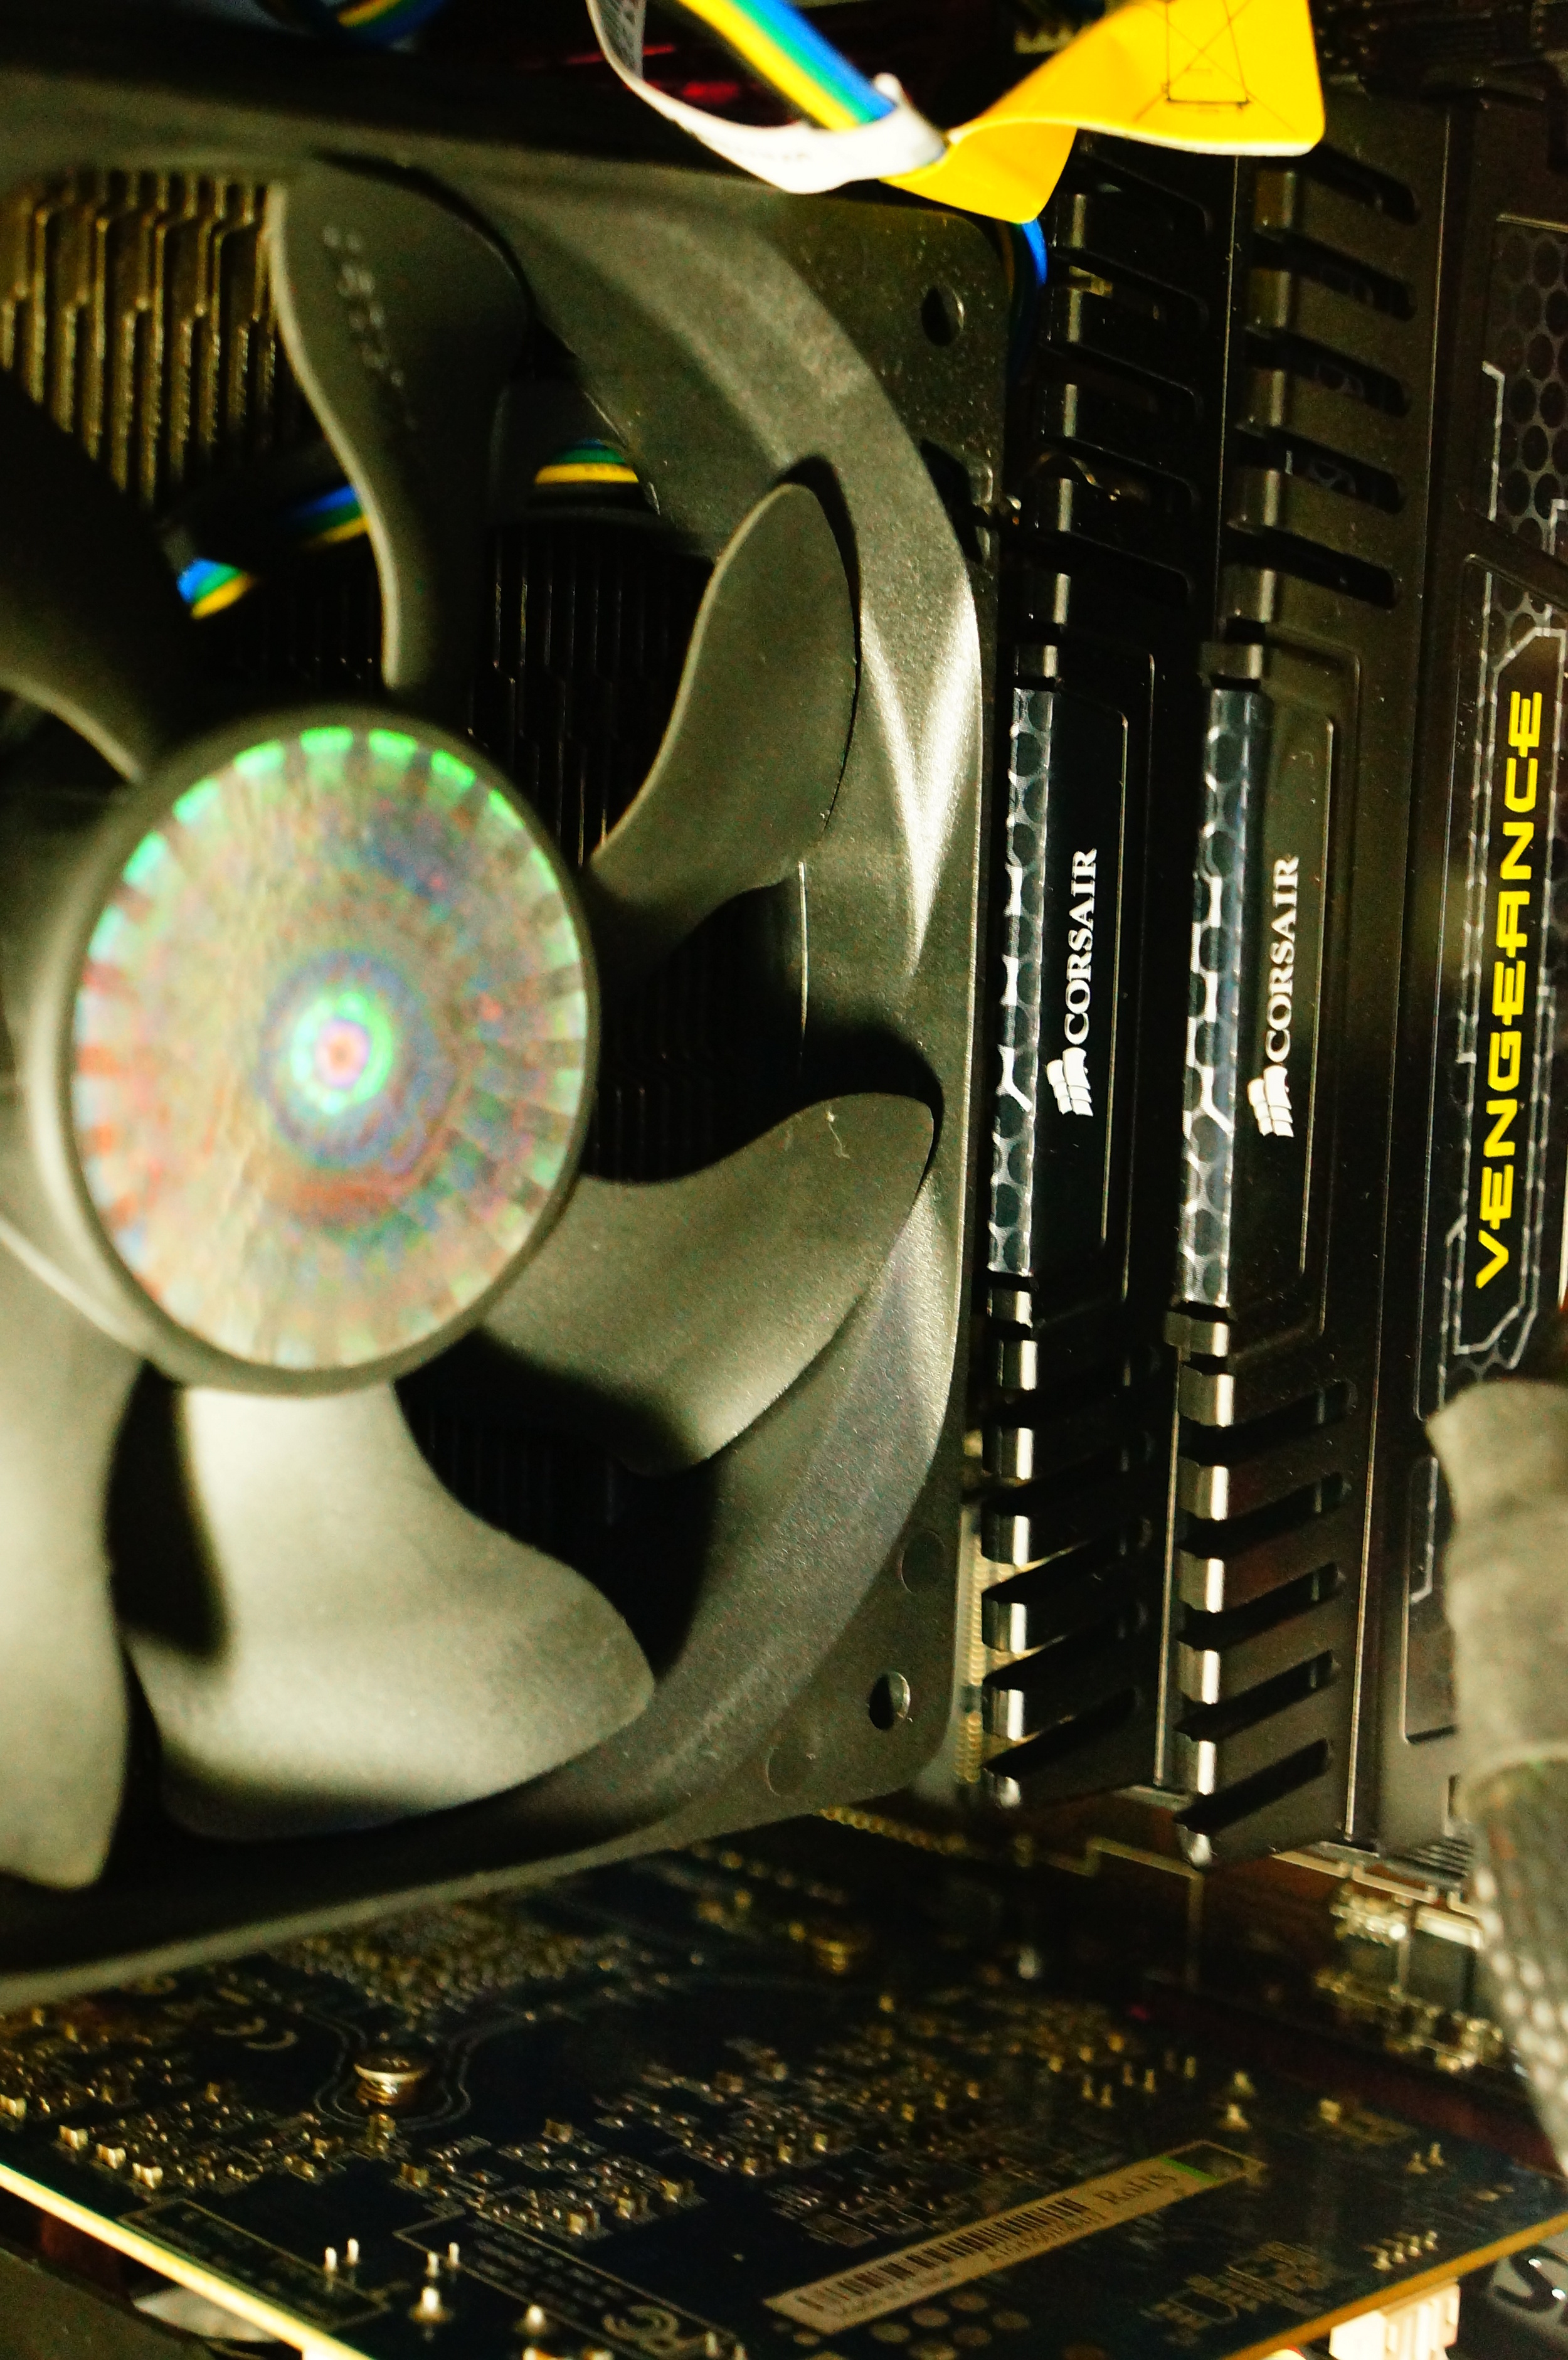
The only setback I had is the TPC 812 makes it impossible for you to place high profile memory sticks on the first 2 slots, options are you can place the CPU fan on the other side or elevate it to couple of inches. I opted for the later (result is seen in the picture below), but I’m still thinking of ditching 1 of the Corsair Vengeance and replace it with a regular one, for the mean time elevating the fan works.
|
Corsair Vengeance + Cooler Master TPC 812 |
Result: Fan is elevated up to an inch; thankfully I haven’t encountered any problem yet. |
Final Thoughts
Upgrading my PC has been one of my dreams and the parts I chose didn’t disappoint. I’m now able to play games without sacrificing visual effects and without experiencing lags. I’d definitely recommend the MSI Z87-G45 and the Cooler Master TPC 812 for the enthusiast, but if you’ll go for a TPC 812 better make sure to get a low profile memory or remove the fins. I would eventually try out overclocking but only after the warranty is gone so that’s approximately a year from now. However, since I’m still under warranty I’ll continue on playing and catching up to the greatest games of 2011. I can't wait to start making reviews and sharing my game escapades here at Too Much Gaming, maybe I'll make a review for Shogun 2 Total War as a start. ^_^
Here’s a couple of links for a detailed benchmark of the highlighted hardware:
- MSI Z87-G45 Gaming: http://www.techpowerup.com/reviews/MSI/Z87-G45_GAMING/
- Intel Core i5 4670 3.4Ghz: http://www.cpu-world.com/Compare/506/Intel_Core_i5_i5-4670_vs_Intel_Core_i5_i5-4670K.html
- Corsair Vengeance 2x4GB DDR3: http://www.overclockers.co.uk/showproduct.php?prodid=MY-299-CS
- Sapphire ATi HD 6850 1GB DDR5: http://www.techradar.com/reviews/pc-mac/pc-components/graphics-cards/sapphire-radeon-hd-6850-962568/review
- Cooler Master TPC-812: http://www.legitreviews.com/cooler-master-tpc-812-cpu-cooler-review_1913


